Add KVM storage pool
If you run out of disk space you may add a new disk.
Note
KVM mush then be informed about this new space available by creating a new storage pool.
Add the drive to the system
After booting with the new drive, check dmesg to find out the name of the new disk. It will probably be called /dev/sdSOMETHING.
Double check this is actually the new disk, if not you may erase all the contents of the system. Type df to see the old disk partitions.
Create a new partition with fdisk. It should show it as empty. Add only one primary partition for all the free space.
Replace sdX by the real name of the new device:
sudo fdisk /dev/sdX
Format it with large files tunning:
sudo mkfs.ext4 -m 0.001 -T largefile /dev/sdX1
Mount the new partition
First find out the UUID. Copy the UUID value, use it for the next step.
blkid | grep sdX1
Add this new partition to the filesystem table:
sudo mkdir /var/lib/libvirt/images_2
sudo vim /etc/fstab
UUID=e5ff57d7-cde6-4117-ac5d-1b14ac5b218f /var/lib/libvirt/images_2 ext4 rw,relatime 0 0
It will mount it next time you boot, but it can be used without rebooting issuing:
sudo mount -a
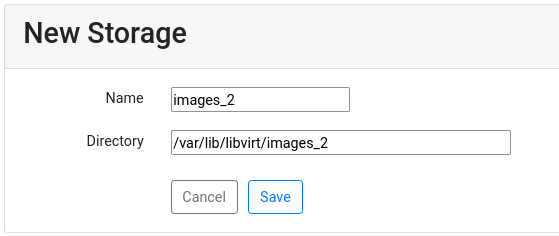
Add the drive to the Virtual Manager
You must access the link of your own server. Then access Administration Tools>Storage and select New Storage; Select the name and directory and confirm the changes
And that’s it, now Ravada will use the pool that has more empty space the next time it needs to create a volume. If you want to fine tune what storage pool is used by default follow the advanced settings documentation .
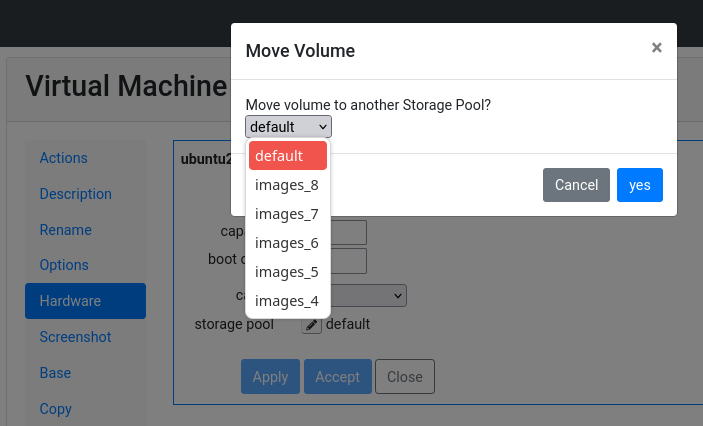
Using the storage pool
When adding disk volumes to a virtual machine, you can select on what storage will be saved.
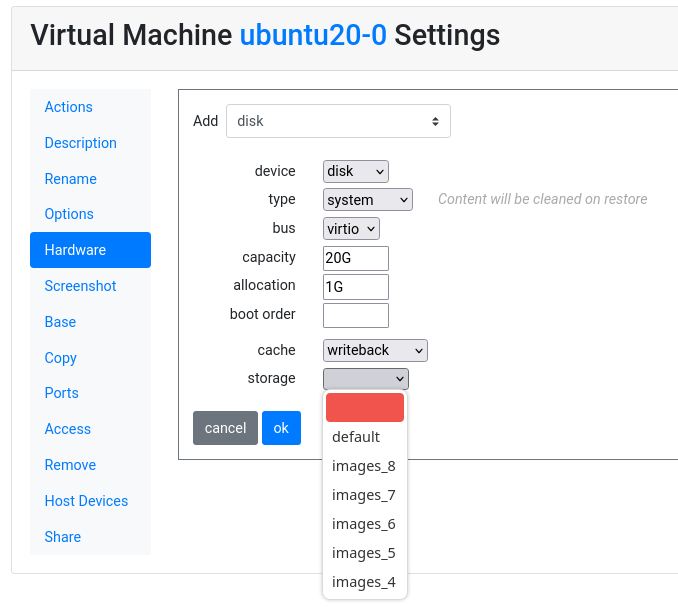
Once the virtual machine is created, the volume can be moved to another storage pool.