Install Windows 11
These are guidelines to install Windows 11 inside a Ravada KVM Guest.
Requirements
Windows 11 requires TPM ( Trusted Platform Module ). Follow this guide
Installation sources
The Windows 11 ISO image file is required:
Download it and copy them in the Ravada host server at the directory /var/lib/libvirt/images .
Virtual Machine features
The guest should have more than 4 GB of RAM You can increase it later if you want to keep it slim.
At least 60GB disk drive are required. A swap partition should also be added when creating the virtual machine.
Create the Virtual Machine
From the web management tools, go to “New Machine” and create select the Windows 11 Template and the ISO image you just downloaded.
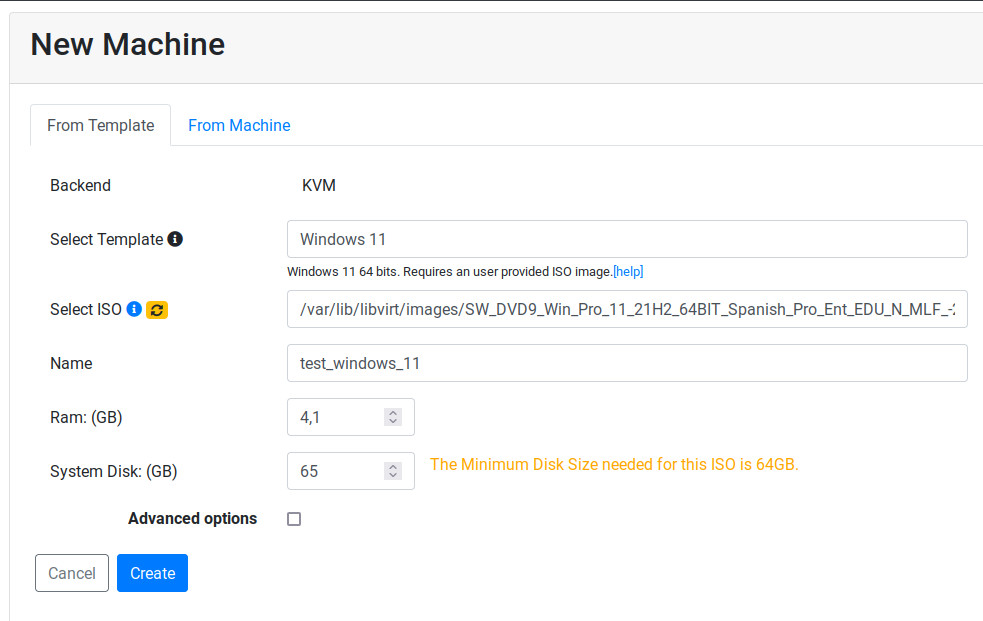
Set more than 4 GB of RAM and at least 65 GB for the disk drive.
It may take a few minutes if it is the first Windows virtual machine that is installed in this system. Ravada will download the additional drivers ISO volume.
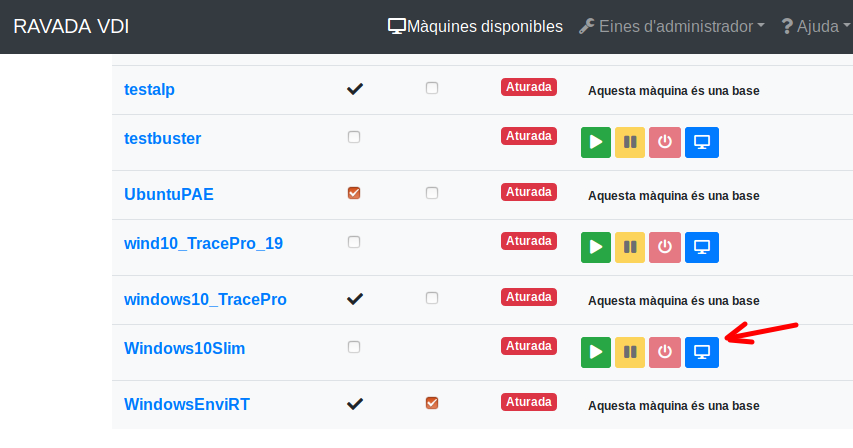
When the machine is created start it from Admin Tools menu, click on Virtual Machines to see a list. At the right there is a bunch of buttons. Click on view to start and access the virtual machine console.
Start and View Virtual Machine
Install The Operative System
From the Virtual Machines admin tools , click on the blue screen from the one you just created.

The Virtual machine is starting, you will see a link for the spice viewer. Click on it to see the virtual machine screen. The password for the viewer will be copied in the clipboard. Just paste to in the authentication form to access to the viewer.
Boot from CD
You may see this screen and a Shell> prompt.
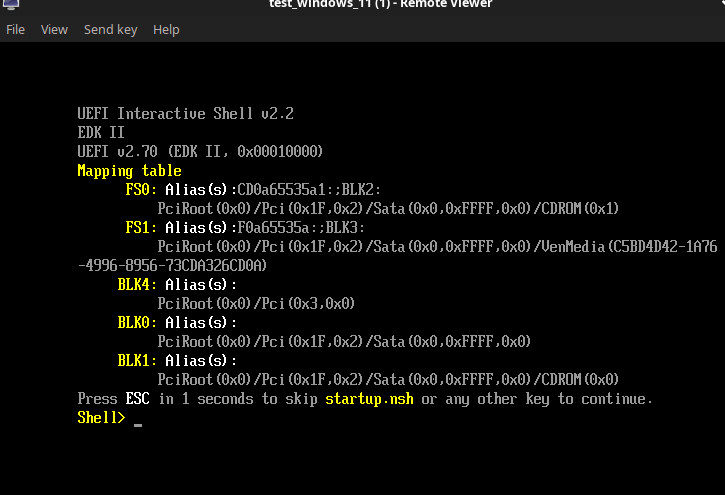
If you see this screen is because you missed the CD search screen. Click on Send Key at the top of the viewer window, and choose Ctrl Alt Del. Click back on the viewer and press a key when you see this message:
Press any key to boot from CD or DVD
Install Windows 11
Follow the usual procedure to install Windows 11. Select your keyboard, language and other settings.
Windows drivers
The installer may not see the virtual machine disk drive. Choosing “Load Drivers” in this screen and select
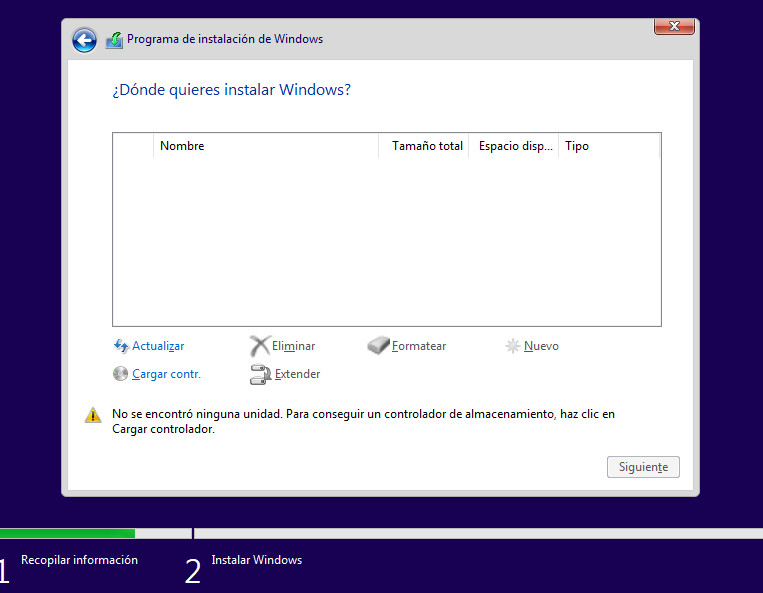
Click on “Examine”, you should see two CD units. The drivers are in the second one called something like “virtio-win”. Choose amd64 and then select the operative system you are installing.
For Windows 11 it should the driver as Red Hat VirtIO SCSI controller (E:amd64w11viostor.inf)
Click on Next to continue installing Windows.
Choose Destination Drive
Some disk drives volumes will appear. Choose the bigger one to install Windows 11 there.
Setup
Follow the usual procedure to install Windows11.
When the installations it’s finished, you need to install:
Windows Post Install
When the installations it’s finished, you need to install:
qemu-guest agent, see the instructions here: https://pve.proxmox.com/wiki/Qemu-guest-agent#Windows
Windows guest tools - spice-guest-tools .
make sure that acpi service it’s activated.
If you experience slow response from the mouse or other glitches you may try installing VirtIO Drivers .
The drivers CDROM should have been automatically located in the secondary cd drive in your system.
Use a swap partition for pagefiles
By default the Windows pagefiles will go to the C: disk drive. That will make the clones partitions grow up too much and fill your host disk drive. It should go to the SWAP volume, problaby in your D: or E: drive.
In this link you can see how to move pagefiles to another disk:
https://winaero.com/blog/how-to-move-page-file-in-windows-10-to-another-disk/