How to extend a Ravada Windows guest’s disk space
Extending a Windows disk drive in a virtual machine is a straightforward process. Follow this guide carefully.
The process requires execute a hardware change in the Ravada frontend and then use the command line in the host to resize the partition.
Shutdown
The virtual machine must be down to resize the volumes. Press Shutdown button in the Admin Tools.
Backup
Make a backup of the disk volumes. The easiest way is to compact the virtual machine. After that you should have a copy of all the volumes in the images directory. Usually located at /var/lib/libvirt/images.
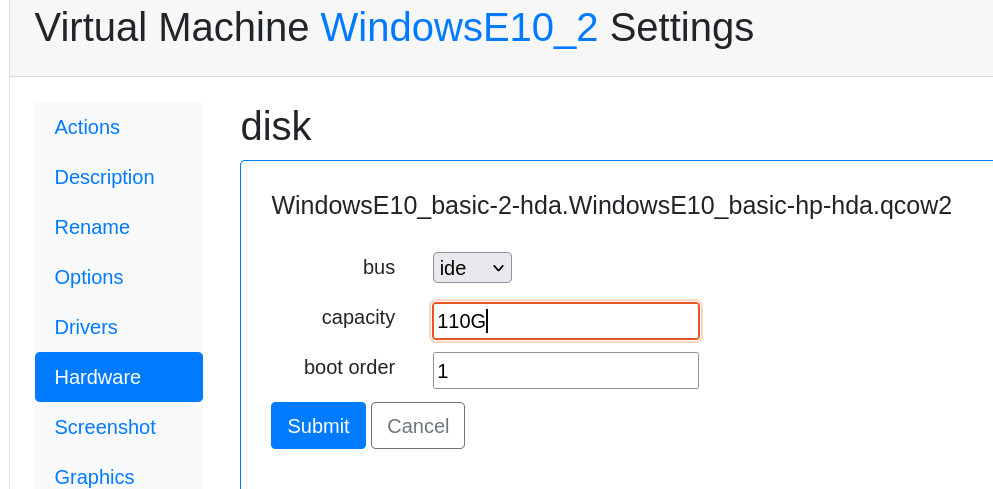
Expand the volume
Go to the Hardware tab in the virtual machine settings. Select the disk drive you want to extend and type the desired size of the volume.
Remove and create the partition again
This part of the process must be down in the command line. Connect to the server console and go to the images directory:
sudo bash
cd /var/lib/libvirt/images
Connect the disk volume as a device
modprobe nbd
qemu-nbd -c /dev/nbd1 /var/lib/libvirt/images/WindowsE10-hda.qcow2
Now the volume appears as an nbd device in the host system. You can use fdisk and other tools to change the partitions.
Remove and create the partition
First let’s check what are the partitions with fdisk:
fdisk /dev/nbd1
p
Disk /dev/nbd1: 110 GiB, 118111600640 bytes, 230686720 sectors
Units: sectors of 1 * 512 = 512 bytes
Sector size (logical/physical): 512 bytes / 512 bytes
I/O size (minimum/optimal): 512 bytes / 512 bytes
Disklabel type: dos
Disk identifier: 0x88e082d8

Device      Boot   Start      End  Sectors  Size Id Type
/dev/nbd1p1 *       2048  1126399  1124352  549M  7 HPFS/NTFS/exFAT
/dev/nbd1p2      1126400 62912511 61786112 29,5G  7 HPFS/NTFS/exFAT
The partition we want to change is the second one (nbd1p2). From fdisk:
# fdisk /dev/nbd1
Command (m for help): d
Partition number (1,2, default 2):
Partition 2 has been deleted.
Now we create the partition again but using all the space we just added. Warning: when asked about remove the signature, answer N.
Command (m for help): n
Partition type
   p   primary (1 primary, 0 extended, 3 free)
   e   extended (container for logical partitions)
Select (default p): p
Partition number (2-4, default 2):
First sector (1126400-230686719, default 1126400):
Last sector, +/-sectors or +/-size{K,M,G,T,P} (1126400-230686719, default 230686719):
Created a new partition 2 of type 'Linux' and of size 109,5 GiB.
Partition #2 contains a ntfs signature.
Do you want to remove the signature? [Y]es/[N]o: N
As it was a NTFS partition we change it to that
Command (m for help): t
Partition number (1,2, default 2):
Hex code (type L to list all codes): 7
Changed type of partition 'Linux' to 'HPFS/NTFS/exFAT'.
Then save an exit fdisk:
Command (m for help): w
The partition table has been altered.
Calling ioctl() to re-read partition table.
Syncing disks.
Fix the new partition
The new partition must be checked and fixed before resize.
ntfsfix
Fix it first in the host:
ntfsfix /dev/nbd1p2
chkdsk
Now we need to let the Windows virtual machine to check the drive.
First of all disconnect the device from the nbd to let it run in the virtual machine. It is a good idea to remove the nbd module to make sure it is properly disconnected.
qemu-nbd -d /dev/nbd1
rmmod nbd
Boot the virtual machine, enter the cmd as admin and check the disk. This command will check the disk on the next reboot. Answer yes when asked and reboot the virtual machine. It will probaly warn you that the disk will be checked unless a key is pressed. Do not press any key, let it continue itself. In a few seconds it will be verified.
C:> chkdsk c: /f
Come back again to the host and tell the filesystem to resize itself to the new full size limit:
modprobe nbd
qemu-nbd -c /dev/nbd1 /var/lib/libvirt/images/WindowsE10-hda.qcow2
ntfsresize /dev/nbd1p2
Disconnect again the nbd and start the virtual machine.
qemu-nbd -d /dev/nbd1
rmmod nbd
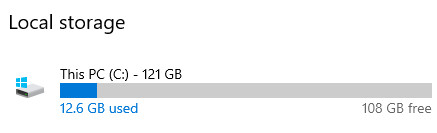
Check the new size
Boot the virtual machine again, go to storage properties of the PC. The new size should be available: