Ravada Cluster
Adding support for multiple Ravada nodes
Description
From release 0.4 we have clustering support for Ravada. This allows the administrator to add more physical hosts so virtual machines are balanced and distributed among all them.

This feature is currently stable. It works but there are some management forms that we have to polish, and we need to test it more.
Nodes
A node is a Ravada backend server that runs the virtual machines. With the current implementation it is required a main master node and secondary nodes can be added later. The master node, also known as local node should be a rock solid server. It will also run some of the virtual machines as they get balanced among all the nodes. Having fault tolerance master node is beyond the scope of this document, but we expect to add a new document for examples of how to achieve it in the future. Contributions welcome.
Secondary nodes are disposible physical hosts. It is our goal to allow theses nodes be up and down at the administrator will and that they could be easily added to a cluster. Ravada should be able to cope with sudden death of those nodes, though it is better if they are disabled and shut down nicely from the Ravada node administation frontend.
Note
A Base virtual machine must always exist first in the main host. Then you can enable it in some secondary nodes. It is not possible to have a base in a node but not in the main server. If you remove the base from main it will become a normal virtual machine.
Storage
Shared storage is not necessary. The base volumes will be synced across the nodes by Ravada itself. When bases are created, the administrator can configure on which nodes will be available for the virtual machines.
All the master and nodes must have the same storage pools configuration.
New node
Requirements
To add a new node to a Ravada cluster you have to install a minimal Linux operating system with these packages. Some distributions have different package names.
openssh-server
libvirt-bin or libvirt-daemon
libvirt-daemon-system
libvirt-clients
qemu-kvm
rsync
This is from an Ubuntu server:
sudo apt install openssh-server libvirt-clients libvirt-daemon libvirt-daemon-system qemu-kvm rsync iptstate
These package should be installed but make sure they are:
sudo apt install file
It is possible to have nodes with heterogeneous operative systems: different Ubuntus, Debians, even RedHats or Fedoras can be added, though it should be easier if all of them are similar or identical if possible.
In some operative systems like Debian, you must create a link to the kvm file to get the node correctly working. It is not necessary for Ubuntu or Fedora/RedHat.
ln -s /usr/bin/kvm /usr/bin/kvm-spice
Configuration
The master ravada node needs to access to the secondary nodes through SSH. So password-less access must be configured between them. This is an example of configuring in Debian and Ubuntu servers. Other flavours of linux should be quite the same.
Before you start
Most of the usual mistakes come from not running the commands from the root user. Follow the guide carefully and double check you are following the instructions exactly. When you see a code like this it means it must run from the root user in the master node:
root@master:~#
This means you must run as the root user in the node.
root@node:~#
To become root user you must either login as such or run sudo to become root:
frankie@master:~ sudo bash
Configure Node
First, temporary allow root access with ssh to the remote node.
root@node:~# vi /etc/ssh/sshd_config
PermitRootLogin yes
Then set a root password and restart ssh service. Warning: only do this if you haven’t already set a password for the root user in this host. If you are using an Ubuntu server you probably haven’t, but debian based distributions usually set the root user on install.
root@node:~# passwd
Enter new UNIX password: *******
root@node:~# systemctl restart ssh
Configure Master
Check you can access with root from master to node:
root@master:~# ssh node
You may already have a public/private key created in the master node. Check if there are id*pub files in /root/.ssh directory. Create the keys otherwise:
frankie@master:~ sudo bash
root@master:~# ls /root/.ssh/id*pub || ssh-keygen
Now you must copy the public ssh key from master to node:
root@master:~# ssh-copy-id -i /root/.ssh/id_rsa.pub node
Check it works:
root@master:~# ssh node
Now you can restore the PermitRootLogin entry to the former state in the file /etc/ssh/sshd_config at node.
PermitRootLogin prohibit-password
Security
It is advisable have a firewall configured in the node. Access restrictions should be enforced carefully. Only allow ssh login from the master server and other operational hosts from your network.
Networking and Firewall
For the master node to start the other nodes it must have some open ports.
Master
Master must be able to send packets on udp port 9 and tcp and udp port 7
# wake on lan
-A OUTPUT -p udp -m udp --dport 7 -j ACCEPT
-A OUTPUT -p tcp -m tcp --dport 7 -j ACCEPT
-A OUTPUT -p udp -m udp --dport 9 -j ACCEPT
Nodes
Nodes must accept packets on udp port 9 and tcp and udp port 7
# wake on lan
-A INPUT -p udp -m udp --dport 7 -j ACCEPT
-A INPUT -p tcp -m tcp --dport 7 -j ACCEPT
-A INPUT -p udp -m udp --dport 9 -j ACCEPT
Operation
Add nodes in the new section Admin Tools - Nodes
Allow a base to create clones in nodes checking them in the machine management section, at the Base tab.
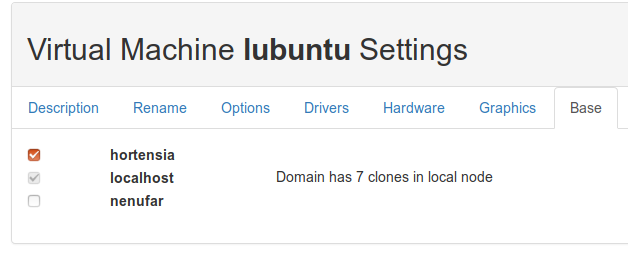
Now try to create multiple clones from a base, they should get balanced among all the nodes including the master one.
TroubleShooting
libvirt error code: 38, message: End of file while reading data: nc: unix connect failed: No such file or directory
It means you didn’t install libvirt in the node. Fix it this way:
For Ubuntu 18.04:
root@node:~# apt-get install libvirt-bin
From Ubuntu 18.10 instead of libvirt-bin you need install libvirt-daemon-system and libvirt-clients.
root@node:~# apt-get install libvirt-daemon-system
root@node:~# apt-get install libvirt-clients
Balance algorithm
How does Ravada decides which node will handle the next virtual machine ?
We may choose a different algorithm in the future, or even allow a setting to change it. Right now it goes that way:
The list of nodes gets sorted by the number of virtual machines running. If there is a tie, the node with more free memory is chosen.
We have an extra step for speeding things up, when checking the nodes status, if one has less than 2 virtual machines running, and it has free available memory, it is picked.
There is a drawback we have yet to fix: if many virtual machines are started at the same time, some may probably go to the same node. This is because a lot of work is done in parallel.
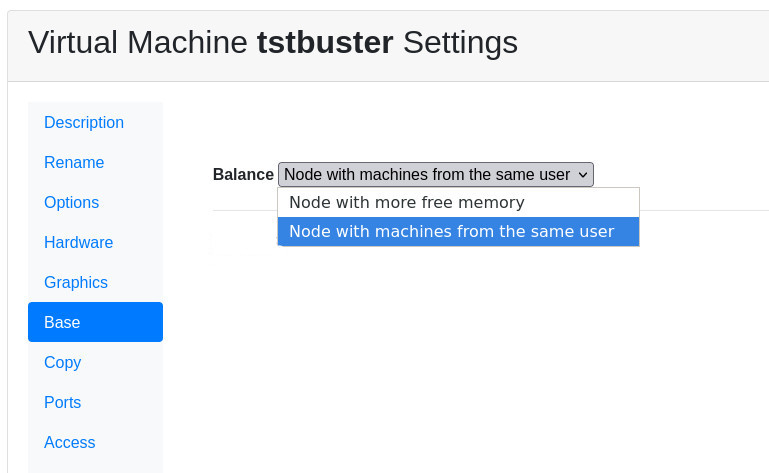
Selection algorithm
Now you can choose to run virtual machines in the node where the user has other machines started. This may be usefull if you want to do networking among virtual machines like in teaching environments.
Go to the base virtual machines settings and select the Base tab. Change the algorithm for all the bases you want to have started in the same node.
TODO
We already know we have to improve:
administration forms in the web front
check if nodes storage gets filled
documentation
This is a new feature, we are currently testing. Feedback welcome through our Telegram public forum http://t.me/ravadavdi or github issues .